
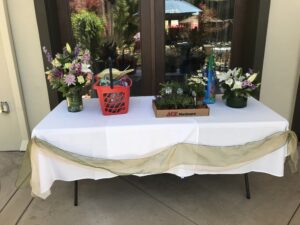
Recently we were asked to help with an event at San Rafael Oakmont Senior Living Center. We had originally thought of just doing a repotting demonstration, but then somebody (the marketing team) had the brilliant idea to do fairy gardens instead. Our marketing team was dispatched post-haste and turned out three separate gardens. This blog goes through the materials and steps they used to create one fairly normal fairy garden, one found planter garden, and one…well we did say it was the marketing team right?
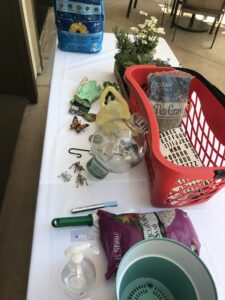
Supplies:
(clicking the picture will take you to the Acehardware.com page for that item.
Not all items were Ace products. Check with our garden guru about those.)
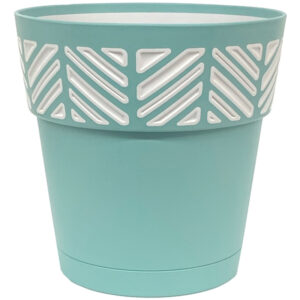 1 flower pot
1 small bag of horticulture sand
1 small bag of pea gravel
 1 small bag of miracle gro potting mix
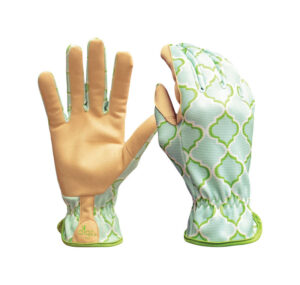 1 pair of leather palmed garden gloves
![]() 1 trowel
1 trowel
 1 spray bottle filled with water
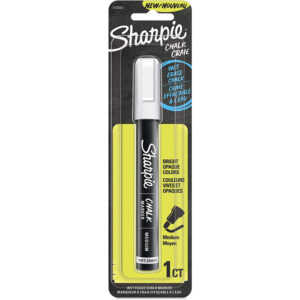 1 chalk pen
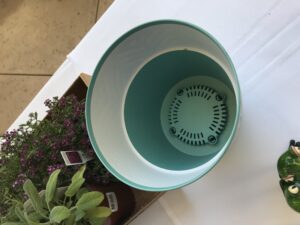
1 terrarium bowl
![]() 1 small plastic watering can
1 small plastic watering can
 1 sheet of vinyl letters
![]() 1 Exacto knife
1 Exacto knife
-various decorative items
-plants(types in the specific instructions below)
Fairly traditional fairy garden

We used a self-draining pot for this so we did not need the full layer of rocks for drainage that we did for the other two.
First, we filled the pot a little over halfway with potting mix, stopping halfway to spritz the mix as we put it in.
For this garden we wanted something blooming and traditionally pretty. So we chose a six-pack of purple Alyssum for our lower coverage and a 4” tall flowering Argyranthemum (Marguerite Daisy) for our taller element.
Gently we dropped the Daisy from its pot and started teasing apart the roots. Often when you buy a fully flowering plant it is going to be slightly root-bound because of the amount of time it has taken to flower. Take the time to untangle those lower roots before planting it and the plant will grow better.
Plant the Daisy up to the bottom stem. Then we used three of the Alyssum and spaced them evenly around the front of the pot leaving room in the middle for a decorative element. We repeated the process of making sure the roots were gently untangled and buried up to the bottom stem. Then we spritz the entire pot until the top layer of soil was moist.
We then added our decorative elements. For this one we kept things simple, a pair of frogs and a painted rock with a little flag. The perfect gift for a friend, a housewarming, or for your sweetheart.
We did spritz it once more after the elements were in place and after it had dried a little to make sure that it had plenty of water.
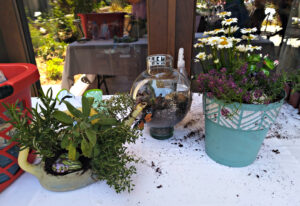
Found container garden
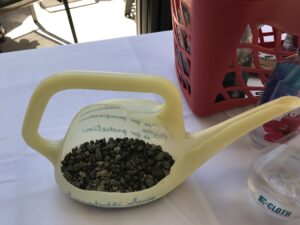
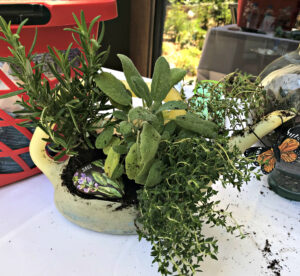
For the second garden, we wanted to do something different. We found a small plastic watering can that was dirty and disused. We cleaned it up and using our chalk pen we marked where we wanted to cut it.
Using a sharp box cutter we were able to safely remove the sections we wanted to remove, however, an Exacto knife is a safer option. We added six drainage holes to the bottom. The actual planting surface was very shallow so we did not want any chance of standing water.
Once the holes were done we put a 1” thick layer of pea gravel evenly across the bottom. It’s important that the gravel does not fully cover the drainage hole. Make sure that no one stone is fully covering a hole.
When the gravel was even we added three inches of potting mix. We had decided that we wanted this one to be a windowsill herb garden.
For our found container we selected Rosemary, Sage, and Oregano. The plus side to using these three is that they were all traditionally assigned special properties. Rosemary ensures that you will not be forgotten, Sage is a purifier, and Oregano promotes joy. You can make an amazing spaghetti sauce and bring some much-needed happiness to your kitchen all at the same time.
As above we pulled each plant separately and gently untangled the roots. Because the container was so shallow we took extra care to make sure the roots were spread and covered evenly. The Sage and rosemary were buried to the bottom stem. The Oregano was split into one larger plant and one small runner to be used in the spout of our planter.
We spritz the soil until it was wet for these, then added a little more soil and spritz it until moist.
This container would also do well for strawberries as they, like the oregano will creep quite happily over odd angles.
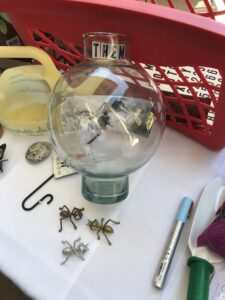
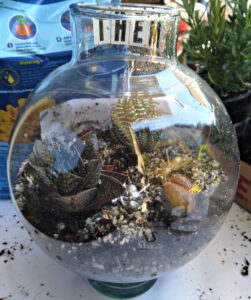
That other garden.
The merchandising team tells us that when they saw the ants in our garden section that this image immediately came to mind.

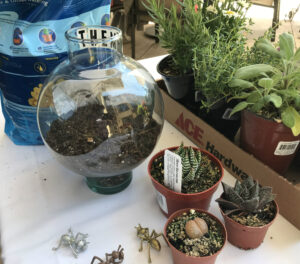
The glass terrarium was chosen to simulate an ant farm.
Succulents were used to mimic the Mojave Desert
The vinyl letters were used in case normal people didn’t know what they were looking at.

Anyway, first we filled the entire bottom stem of the terrarium with gravel. We then added another ½” of gravel above that. We mixed about ¼ cup of the horticulture sand into about 4 cups of potting soil. We spritzed that with water lightly. We then added a thin layer of horticulture sand before deciding where our succulents would go.
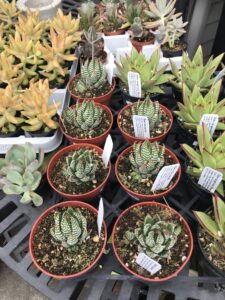
As stated these plants were chosen to simulate the flora of the American southwest desert landscape. So miniature succulents were used.
We chose:
Pebble Plant, Haworthia Coarctata (Zebra Plant), and Gasteria
The succulents were why the leather palms on the gloves were important. When we are not working with sharp and pointy plants we generally use a neoprene glove when gardening as they give protection as well as flexibility. But when potting or pruning, cactus, roses, or anything else like that there is really no substitute for thick leather gloves.
As with the other gardens, we gently pulled the succulents out of their pots and untangled the roots before planting them up to the base of the plant.
Once the plants were in place a little more sand was added to the unplanted sections to create the levels required for the diorama that was planned.
The ants were then added and we told the marketing department that they were not allowed little people to the ant’s mandibles.
The terrarium was then spritzed lightly. There is a myth that succulents don’t need a lot of water, and that is true once established, but when you are first transplanting them they will need more water than normal to help them establish. It’s recommended to do a cup of water the first week and gradually decrease the amount of water given.